Monday 22 July 2019

Takeda Knife Sharpening

Hello,


     The Takeda was a challenge for me to sharpen on full sized water stones. That is, not the Takeda hand held stones that are attached to a wooden paddle. I am sure that anyone who has wanted to sharpen a Takeda is familiar with the YouTube video of Takeda San sharpening one of his knives using the hand held stones. It is easy actually, the whole point of it, and it works but I wanted to see if I can get the knife sharper using my normal method.


    What makes this particular brand of knives different is the grind that Takeda San uses. It is a zero grind, there is no secondary bevel, the blade tapers from the spine to the edge, a Scandi Grind which is meant to be easier to sharpen and it is. It is easier theoretically because there is no angle control issues but I still had to figure out the best way to crack the Takeda code and get it as sharp as I possibly can.

   The purpose of this post is just to explain how I do it and yes, I am completely satisfied with the results, if I can do this, you can.

Step 1 Finger placement up behind the edge/


     Finger placement and where to apply pressure is the key to sharpening success on these knives. Typically on any other non zero grind knife like this beauty, 
Fujiwara
     I would place my two Pressure Fingers as close to the edge as possible and sharpen it applying my four levels of pressure as always.

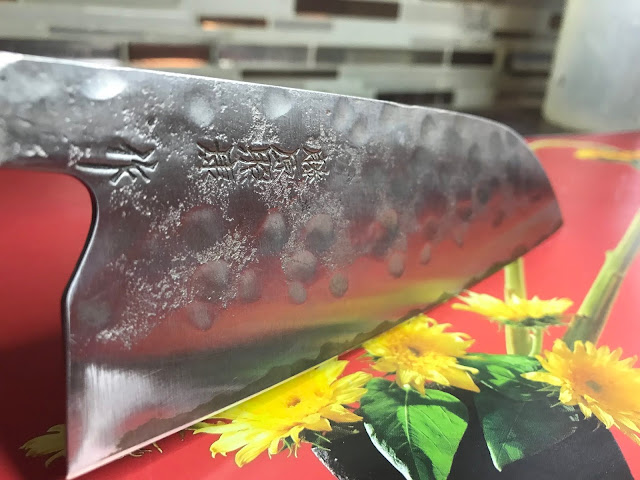
     However with the Takeda, as you can see in the picture above my two fingers are up higher, about 4mm from the edge, Right where the Blacksmiths Finish, that black Kuro-Uchi finish ends, that is where I first put my fingers to start the sharpening process.

     I want to start up there to influence both the aesthetics of the blade, the way it looks but most importantly to keep the blade thin, so for me this is always the approach I take. So the first stage doesn't result it any sharpening, it's the precursor to the actual sharpening, it is an important and relatively easy step to take. I start on the coarse stone and just grind until I am happy that I have accomplished my goal, I will switch stones and move up in grit until I am happy with the appearance. 

     However, before switching stones, I move my fingers down closer to the edge, as close as I can get and start the sharpening. I repeat this with every stone. 

Step two finger placement CLOSE to the Primary Edge


Step One - My two fingers are placed higher up behind the edge.

Step Two - My fingers move down to the edge as per any other non zero grind knife.

(Both steps take place on every stone I use).

   The key is NOT to raise the angle by lifting the spine of the knife off the stone. You don't need to worry about holding an angle which makes these knives easier to sharpen. Basically, the blade is resting flat on the stone and it is just fingers being in the right position that are generating the burr formation and burr removal by adjusting pressure as necessary, I use ever diminishing levels of pressure to clean the edge. Believe me, if the steps above are followed the burr forming and removal are inevitable. Takeda San doesn't worry about burr formation when he sharpens, this is due to the grind of the knife. So it isn't like sharpening a Fujiwara for example where  you form the burr and feel for it, then start removing it. Just follow the steps and the knife will turn from any stage of dullness to remarkably sharp. Like everything else, there is a learning period so manage your expectations.

   The Pressure being applied by my two fingers close to the edge will actually raise the angle just ever so slightly which is fine, Im pushing down on the edge so it just lifts the spine a little. The knife will become very sharp quickly and will retain it's zero grind. If I were to raise the knife off of the stone to achieve an angle I would just be applying a micro bevel, that is not the goal for me.


It is not difficult once I figured it out and I usually stop at 8k or 10k.  I learned to sharpen with both hands just for these knives which impacts the way the wide bevels look but not the sharpness so don't worry about it.

Please just send me an email or make a comment if there are any questions, if I have not explained it well enough..

Peter
sharpenerpeter@gmail.com


Tuesday 9 July 2019

Adjustment to techniquie

A common combination for me

Hi there,

    First of all, what you will read here is optional. I share my sharpening experiences because I really enjoy writing about knife sharpening and also, it may, just may help someone. I never want anyone to think, "it's my way and my way only".  This particular post has something to do with BURR FORMATION as I talked about in my last post and what has changed for me since. 
Don't feel like you NEED to do this to achieve sharp knives.

     For anyone who has followed my sharpening journey, you know that I use four levels of pressure, (I still do) and I start by forming a burr on the first stone only, and then everything I do is about removing the burr and not forming any burrs after the first one. That has since changed and here is how I do it now:


     What I have to come to realize is that this is a mindset change, not a real physical adjustment, I will explain.

    Previously, I believed that additional burrs formed after the Primary Burr was unnecessary as it was a waste of metal, so for many years, a decade, I "thought" I was only forming the first burr and that was it, no matter how many stones I used. 

   After talking to Jon Broida of Japanese Knife Imports, a brilliant sharpener by the way, I no longer feel that way. I was quite surprised by his response, when I asked him about it. (I was prompted to ask him when another great sharpener named Kevin who told me about it, so I verified the information with Jon)

   Jon told me to think of the "waste of metal" piece as testing a string of pasta for doneness, one noodle, it hardly matters, it's insignificant.  The reason we want to form these micro burrs on the medium and finishing stones is to ensure that we are hitting the edge of the edge.

    As I mentioned earlier, this is mindset change for me. I started sharpening about a month ago with the plan to make a burr on every stone but I didn't change anything with regards to the amount of pressure I use. THIS TIME however, I felt for a burr on the medium (1k, 2k or 3k) stone, I mean actively felt for it where in the past I assumed there was no burr due to the decreased level of pressure I was using since I had already formed the Primary Burr using heavy/moderate pressure.  I was quite surprised to feel a tiny burr and I continued only to find that even on the 5k or 6k, when I felt very carefully there was a tiny burr.  
  
   Another friend made me realize that it's inevitable, if you are grinding metal away on both sides, even using moderate to light pressure you can form a small burr.  NOW, the change to the way I think is that this is okay, I am only wasting a noodle or two, and there is a million noodles :)

Masakage Koishi


Here is my adjusted technique:

    Lets assume I am sharpening a knife using a 500, 1,000 and 6,000 grit stone combination.


    1.    I form the Primary Burr on the 500 grit stone using P4 pressure, no change here, I'm using whatever pressure is necessary to form the burr on this particular knife.  I follow up with a 50% decrease in pressure to start the burr removal process  (P3), then as I always did I again reduce pressure, using P2 and P1 pressure. 

    I conduct the light test to ensure that I have removed all the metal I possibly can, if so, I move on.

2.     I grab the 1, 000 grit stone and now use P3 pressure, I now want to feel that micro burr and it doesn't take long at all, I move from tip to heel and then heel to tip on the right side of the blade, flip sides and the go from heel to tip and tip to heel using trailing strokes as always and low and behold the burr is almost always there. (I have since sharpened about 100 knives with this new mindset). If I can't feel a burr I just do the exact same thing again, my goal now is to form the most subtle burr that I can, I want to feel it but I want it to be tiny. If I have to increase pressure a littel I will, but just a little. When I do feel the burr,  I go through the P2 and P1 pressure levels to remove that micro burr. The pressure is very light so I am not forming any more micro burrs, not that I can feel. 

NEW CHANGE HERE:

2 a.    Before I move to the finishing stone I strop the knife on leather to reduce burr size even more. Burr removal is so important so whatever I can do to remove it, the better the results. (Actually, this can be done between all stones, so I can use the leather strop after the 500 grit stone) 


3.    With my finishing stone, 6k or even 8k, I repeat this process. So yes, I am forming a micro burr on these stones, once only and then I remove it.


NOTES:

So what have I noticed, if anything by doing this?

   The knives are the sharpest that I have ever made them. Now to be honest, I was making them very sharp before this so perhaps this is a perception rather than a reality. I can honestly say that the knives feel sharper though. The change is minor but it's a process I will continue.

    Another point is that there are extremely gifted sharpeners out there who do not do this, they form a Primary Burr and that is it and how can I disagree with them, I can't because I am 100 percent convinced that either way works. I have proven it. In fact, most sharpeners only remove the burr on the final stone.


    If you are curious about this, give it a shot, sharpen 10 knives this way and see if you can tell the difference. There is no harm in it and in fact, my belief is that doing this can improve your skills because you are trying to form the most subtle burr possible using just the right level or pressure. You are not just forming big burrs on every stone, that is not what the goal here is. The goal is to ensure that the edge of the edge is being worked on, on every stone.


   I have not ruined any of the 100 knives I have worked on in the last month so it's not a bad thing.

    Again, just my sharpening process, not yours perhaps.


Add caption

(Magic Erasers by Mr. Clean do an amazing job cleaning a ceramic hone by the way)

I hope I have not confused anyone, just fire any questions away.

Peter