Tuesday 23 December 2014

More Coarse Stone Magic

Naniwa Chosera 400


 Hi everyone,
As you likely know, I am a strong believer in the coarse stones, if you are going to spend money on a premium stone, do it on your coarse stone first, then the medium (1k-2k) and the fine stones last.

I've had the opportunity to sharpen a lot of knives in the last month, approx 600 and in that time I stumbled up something that I can pass along. I am also a firm believer that sharpening is a learning journey, you never stop learning and I pray that I never get to the point where I think I know it all.

This is what I tried and found an interesting edge, the Power Edge and I'm going to give it to a chef to try for me.

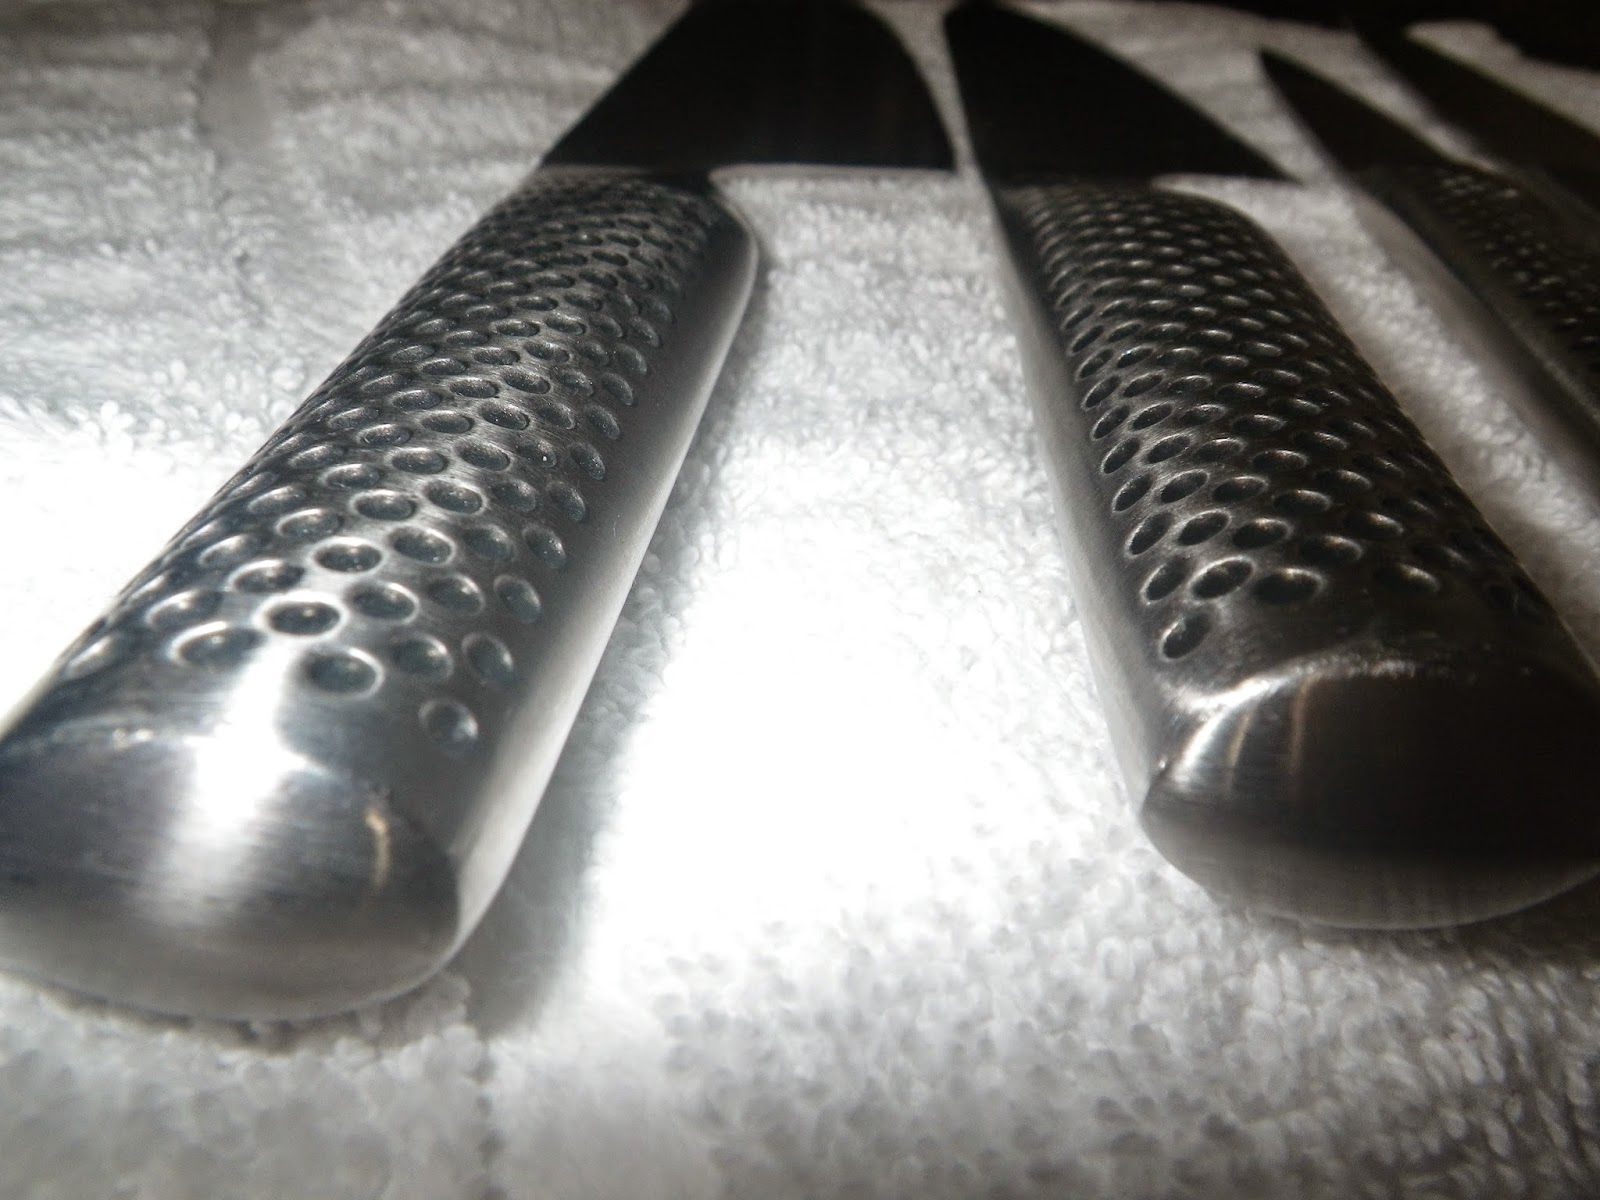
For my scenario, I started almost every session with a 220 grit stone and I just got this awesome Naniwa Lobster 220 from Knifewear in Edmonton. Knifewear is a pretty cool spot and they know their stuff.

Naniwa 220 Lobster

I love large stones and as you can see this is a beast but a gentle beast, it works quickly  but doesn't feel gritty and mean if that is a good word to use.


I also have a container of water handy that I dip the blades in very regularly.


I chose this one because it is long


I grab a dull knife and if it is very dull I start by dipping the edge in the water and then onto the 220 water lubricated stone, lots of water on top.  This dipping of the edge is just something I started recently and I like it, I like to work with a clean edge, it's a habit I am in the process of forming and I don't intend to stop.

This 220 is going to produce a burr quite quickly so it doesn't take long. The knives I get are often brutally dull and in the worst case they have been through a grinder of some type which extends the work period on the knife. However I always strive to work out the damage created by machines and the coarse stones are perfect for that.  I realize that many people just sharpen their own knives of course and can usually go right to a 1,000 grit stone. That's cool and good on you for keeping your knives sharp. I'm just sharing my day to day sharpening experiences.

I do the same thing now with every coarse stone, start with medium to heavy pressure depending on the edge, depending on how much work I need to do to get the bevels into a condition where I can actually sharpen the knife.

Step one is medium pressure or heavy pressure then I clean off the blade and stone and then repeat the process, so Step 2 is  with less pressure now, the burr has  been created so I don't need to create another one, although it usually appears anyway.
Step 3 is again with a clean blade and stone, the same stone and this time with negative pressure, I mean just the weight of the blade and with extremely focused strokes.

Now I have finished  with that stone, I clean the blade again by dipping it in the water and you can see the grit fall off the blade. Then I strop the knife on my 13k Stone, you could use your highest grit stone for this if you want to try it.

Now I move to my 400 Naniwa  Chosera and repeat the process exactly paying very close attention to my pressure. I don't need to use heavy pressure at all but I do use medium pressure and as a result a small burr forms usually but the next step, which is the same process but with less pressure ensures the burr is removed. Again, I dip the blade before commencing and in between pressure stages.

This is followed up by another stropping on a finishing stone and I usually do very light trailing strokes, 10 total.

Now the knife at this stage is extremely sharp and this is where I am going to stop and give it to a chef one day to try,  The edge feels awesome, shaves arm hair and is polished by the finishing stone but it is still a toothy edge. So I am curious to see how long it will last on the job.

However, a move from this stage to a 1k or 2k stone is easy and quick.
The point of this particular post is to explain the new edge this 400 edge that is impressing me but you do need to go through the pressure stages to achieve it.


I think you could do the same thing with the EP  but I'm not suggesting this is the NEW EDGE that will work miracles, I am just saying that one can do wonders even with a coarse stone. Patience is always rewarded.


Grohmann Santoku

When things have settled down I'm going to do a video of the 400 edge process and I'll let you know if the edge is actually beneficial in a kitchen. It is in mine but I want to run it through a pro kitchen.


Merry Christmas

Peter Nowlan

Thursday 18 December 2014

Stropping - Been there Done that.

Hi,
I'm still sharpening at a steady pace but I like to keep my Blog up to date as much as I can.  Now I haven't done any Christmas shopping or anything like that but this is something I really enjoy.


One of the knives sent to me was damaged, I am really getting a lot of these, I don't think folks have a really good idea about these Japanese Knives, i.e. how to handle them. I think they hear and read that these are THE knives to have but are soon disappointed when they chip them. It's a cost that they will learn the hard way I guess. I don't think I would buy one myself, now I would pick up a
Misono UX 10.  Again, this is coming from someone who has an obsession with water stones and sharpening, not knives. I just see a lot of them, over 500 in the last 3 weeks.

I gave up using a leather strop a long time ago, I found that they were easily cut and they always felt dirty, gritty to me. Now I know they can be kept sterile by placing them in a bag or something but I don't have the time for that. I did all the Kangaroo leather, nano cloth stuff with magical sprays but I'm completely over that stuff.

Now what I do find very effective is to strop on a ultra fine stone, and I use the Sigma Power Select II 13,000 grit. I also strop in between grits so when I am finished using the coarse stone, I dip the blade in water to rinse off any debris and then I use very light, and I mean light, trailing strokes on the 13k stone that is also wet.  I just do about 5 passes and I do find it improves the edge, it just gives it a little pop. I strive for a very clean edge, not polished per say just very clean.

Now the Naniwa Atoshi 2k green brick does leave a fantastic polish, that stone is amazing.


This is my setup, I have my coarse stone and any other stones I use on the right, in the Suehiro sharpening pond which I love and that is my Sigma 13k stone on the right, my stropping stone and the Atoma 140 plate in the middle which I use solely for flattening, in fact I spend half day now flattening the "sharpening stones" which are the 400, 1k, 2k and anything else I feel like using but I often stop at the 2k stage and then finish it off on the 13k Stropper. :)

I love the stropping stone, it is easy to keep pristine, it doesn't get nicks in it and it works, I don't care what other people say, it works for me........gees Murray Carter uses newspaper to strop. (which is also cool and effective by the way)

Some more pat myself on the back before and after shots.


There is one water stone in particular that has been on my wish list for 4 years, it is expensive, about $300.00 but it is one of those things that I have always wanted. I am sure that I have looked at it online 400 times and dreamed of owning it

A few days ago, a knock came to my door and the UPS guy delivers a package.
This is what was inside:

MY DREAM STONE.

Naniwa Chosera 10,000


Needless to say I was absolutely shocked that someone would send me this as a gift, a gift that is folks, someone I did work for sent it to me, he knew how much I loved it. Came wrapped in silk.

COOL EH.


I haven't used it but I do have a new Murray Carter knife coming my way, not mine but I may get a chance to use it on that.


NOW if you have a leather strop, go for it, I love them, I have a nice one and I am not saying they are not worth the trouble. For me, a guy who sharpens 40 knives a day, I just find the finishing stone easier. You use whatever works for you, that is the most important thing, if it is a piece of newspaper, that is cool, if it balsa that works too. 


Take care and Merry Christmas.

Peter

Thursday 11 December 2014

Konosuke Mirror Knives and some thoughts on Japanese knives

Hello folks, thanks for sticking around as I find myself swamped with knives to sharpen, a ridiculously good thing.
Like Geddy Lee said, "Things that I once dreamed of, have become reality"


This is a mirror knife by Konosuke, the reflection is of the Kityama 8,000 grit stone I finished the knife on.  I think it is a cool picture and a very nice knife.


Over the last 2.5 weeks I have sharpened over 500 knives and many were Japanese (not talking Global or Shun or MAC).

There is a repeating pattern, almost every Japanese hand made knife I got was damaged in some way. I think we all know that those wonderfully hard knives that take an astonishing edge come with a price. Unless handled carefully they will chip.  I think some Chefs who use them do so at first without realizing that they can't be handled in the same fashion as a Henckels or Wusthof.  No cutting butternut squash, especially with one of the knives pictured here.
While beautiful and truly sharp, they are somewhat fragile, they are very light, so much so that it may throw some folks off who own them.

However, it was an honour to sharpen them and I truly appreciate the Executive Chef trusting me with his whole set of these wonders.


Now back to knives and damage, I rarely, if ever see a European knife like a Henckels with any damage unless it is a broken tip. No nicks in the edge.

Globals and Shun also often come to me with nicks in the edge and I don't know if it is a "Knife" Issue or an  "Owner Issue". Clearly there are many obvious cases of neglect but not always.
Just a little twist of the blade while it is stuck in something semi frozen or very touch is enough to take a piece out of the knife. Not so with Grohmann and similar steels like Henckels, the steel is softer and has a little flex.

Now it is easy to repair for me but this doesn't make it any easier on the owner who has paid a lot of money for his/her knife.

I am not completely bought up on the whole Japanese knife thing myself, I don't like the handles, I find the fit and finish less than perfect but that is understandable, people, gifted people often, are making this knives by hand so if it is not absolutely perfect, it is not a big deal. The blade is the most important thing and that is going to be a killer for sure.

If I could have any knife though, I would go for a Bob Kramer.


Here is another shot of the Mirror knife. I did this on 3 stones, all Shapton Glass, 1k, 2k and 16K.
Believe it or not, it produces an absolutely awesome edge. I was in NYC when I was first introduced to the Shapton Glass, 500, 1k and 16K finish and it blew me away. I ran out of 500 stones, have gone through 5 of them so I just went to the 1k instead.


Thank you for being here, I really mean it.

Peter Nowlan


Friday 5 December 2014

Burr Formation SO IMPORTANT

Hello Sharpeners,

I just realised that I am getting 50 people a day looking at my Blog, I don't know if that is 5 people interested in knife sharpening and 45 spammers or people who are bored but I'll happily take the five folks I know are reading due to emails.

As my obsession grew, and I think the real ignition point was about five years ago, I went at things the wrong way. I focused on getting the best high grit stones I could gather and patted myself on the back for having a 15K Shapton Pro and longed for his big brother the 30K.

If you starting out and want to be an awesome sharpener know this:

1. You won't be an awesome sharpener at first, you need to brace yourself and understand that all you need to do is make the knife a little less dull. If that takes 6 months that is OK, it won't happen with one knife, it will with 100 knives if you are playing your cards right.

2. Concentrate on gather three decent stones, forget anything above 5k for now, that can come later,
a 10k stone isn't going to make your knife sharp if you are not getting it sharp off of your 400, 220, 500 or 320.

3. Fixate on technique, get that down and use the sharpie a lot , on the same knife to keep yourself on target.  Whatever works for you, whatever is improving the edge is the style you can adopt and make your own. I use pressure on my trailing strokes only, I changed a year ago from edge leading pressure but either works.  I started doing the knife in sections but I changed that up as you can see on my video. Section sharpening works though, get comfortable and confidence, build layers of confidence by becoming better.

4. Don't count, instead, find a rhythm, counting tends to automate the process and can lead to you flipping sides or stones too early. Listen and feel and look at the edge instead of just counting to 40 and then switching sides.  Not to mention, that is so freaking boring, I tried it and I hated it.
It is OK to have a rhythm count like 1-4 then slide your fingers along the edge or if you are on the Edge Pro just slide the stone but don't sweat that. You will get a feel for it after awhile.


THE BURR

I probably asked 20 people 20 times whether or not you need to form a Burr with every stone and I did not get an answer that I liked, nothing that made sense to me. (Except from a couple of folks that I really admire, but that came later)

The burr is the fatigued metal that has made the knife dull, it is what is left of the primary edge so your sharpening, your abrasive action of the stone on the steel is moving that debris from one side of the knife to the other, to the opposite side of side you are working on.

If you do this on both sides of the blade, and this is the most important aspect of sharpening success, so if you have done this, if you have removed the bad stuff and exposed the fresh strong steel underneath. WHY do you need to do that again.

You don't, you just need to make sure that if subsequent burrs do form, and they will, that you remove them. I hope I am making sense here.

I was told that you need to form additional burrs to ensure you are hitting the edge, I don't agree with that, I agree of course that you need to hit the edge of the edge but forming a burr again and again is just a waste of metal. You'll know that you are on target and sharpening the edge of the edge because the knife is getting sharper, you'll see the scratch marks change, start to smooth out.

You can use the sharpie to keep yourself on target so the burr formation is crucial on the first stone only.

Burr removal is crucial on every subsequent stone or at the end of the process.

I"ll talk about burr removal soon.....I have over 100 knives left to sharpen and more coming.

(With ref to Ceramic knives, you won't form a burr on those, I hate em :) )


Coarse Stone edge but clean, no burr there.

WRAPPED UP AND READY TO GO HOME

Thursday 4 December 2014

Coarse Stones - The Pressure is on

Hi,

As I continue to sharpen 10 hours a day which is about 40 knives or so I again come to realize just how important the coarse water stone is.

Naniwa Chosera 400

Now the Chosera 400 here is definitely my favourite stone in the coarse range and one of my all time favourites.

With this one stone and with a variance in pressure I ( and you) can change a knife from being dull, very very dull to extremely sharp, just this one stone. The key to a successful edge and I mean an edge that will startle you is the coarse stone.

Here is what I do:

If sharpening pressure is measure on a scale from 1 to 5 with 5 being the most pressure, I use this measurement constantly. If the knife is exceptionally dull, as most are....let me clarify this.

In my opinion if a knife is not extremely sharp it is dull, there are just a lot of different levels of dullness and many of those levels represent knives that are still fully acceptable to use. For example, a new knife, Out of the Box Dull, let's face it some are just not that sharp when new but it can still be used of course. Then there are the knives that are so dull a child could play with it.

So if I am starting a knife that is really dull I will use level 5 pressure on the coarse stone. The stone and me are working together, I am not letting the stone do all the work, not until the burr is formed.
So max pressure to get that burr formed on both sides. After that, and still on the 400, I reduce the pressure until eventually I am at level 1 pressure (weight of the blade only).

If I am spending 15 minutes on a knife, 10 of that is on this stone. I make the knife as sharp as possible and my last strokes are stropping/trailing strokes with absolutely no pressure.  THINK of this stone as three stones in one. The first one at max pressure does all the heavy lifting with your help and it is using all of that 400 coarse goodness. The next stage, after burr formation is with level 3 or 2 pressure only and it is a refinement and burr removal stage, it is getting that edge sharper and sharper and finally the last stage is just a stropping motion with zero pressure..


I absolutely love the stone and it critical to my sharpening regime.

Again the key is patience and variances in pressure on the stone, don't move to another one until that knife has a terrific edge, in fact, it's and edge you would be happy to use in the kitchen, we just want to polish it a little bit more.


I often jump to the 2k Naniwa Atoshi from this stone, the results are always awesome.


Here are some pictures of recent work.

Spyderco Delica in VG 10

Not sure of the brand but amazing knife.

Before and After tip . I ruined his screwdrivers. 

Monday 1 December 2014

I haven't forgotten you.

I am still a little overwhelmed by the amount of knives I have to sharpen since the article last week.

I am now averaging 45 a day by hand which represents about 10 hours of work. I don't get them finished but I'm too tired and I refuse to take any shortcuts.

People have usually gone with dull knives for years so another week won't make a difference.

I had a very beautiful knife shipped to me from Montreal today to repair and sharpen.


To be honest I don't know the brand name yet but I do know that it is very expensive, well over a thousand dollars. The edge is quite something, the picture above is the knife on the stones I used to sharpen it. I used the amazing Naniwa Chosera 400, on the left to repair the edge which was nicked and to reset the bevels. All went nice and smoothly after that with a finish on the Kityama 8k pictured on the right.

It goes to show you though, it does not matter what you spend on a knife, it will still get dull and often, in the case of these high end Japanese knives, which are brittle, it can be chipped if not handled carefully. There is not much forgiveness in the edge if it comes in contact with something hard and there is a little twist applied.

One does not simply sharpen a hand made Japanese knife.


This is a tree I saw in Scottsdale with green bark.


Take care friends and bear with me, I have 80 knives to sharpen, I will be back with pictures and stories.


Thanks for sticking around.
Peter

Friday 28 November 2014

Newspaper Article - Stairway to Sharpening Heaven

Article about yours truly

Friends, since the article in the paper, for which I will be eternally grateful, my business has quintupled at least.
I've gone from 2-4 hours a day to 10-12 hours of sharpening, and that doesn't get all the knives done, that is when my concentration falters and my back gives out.

So please bear with me as I ride the wave, I am sure it will die down in a week or so but in the meantime, I have 90 knives to take care of with more inbound.

I am lucky man, I've said it before.

I TRULY appreciate you reading my Blog, it means so much to me.

Peter

Friday 21 November 2014

Chamfer the Sides of EP Stones

chamfer is a beveled edge connecting two surfaces. If the surfaces are at right angles, the chamfer will typically be symmetrical at 45 degrees.

I spoke briefly about chamfering the sides of my EP stones and I said I do not think that it is critical to do so.
However, if you do have something handy to use, it certainly does not hurt and it is easy and quick.  Also, in my opinion, it just doesn't protect the knife, i.e. a sharp sided stone could damage the edge, but it also protects the stones. Some of my stones have developed tiny nicks along the edge that is rapidly repaired by the process of Chamfering.

If you click on the pictures you can get closer shots.....I suppose you all knew that :)


ATOMA 140
This is what I use to chamfer the sides and also, more importantly to flatten my stones, it is critical component of my sharpening setup, especially useful for full sized stones. This Atoma, the best in the world from what I have heard is about 120 dollars Cdn but for most sharpeners, it will last a lifetime. I am on my 2nd one now. 

For EP sized stones, I set the Atoma plate down as shown and simply hold the stones at a 45 deg angle and run it back and forth, approx 5-10 times with gentle pressure will do the trick. Don't sweat the angle too much, as long as you are making he flat, sharp edge a little less severe.


EP 1k on Top and Shapton Pro 1.5 K below, unchamfered.


As you can see here in the pic which is not to bad considering I used my phone which happens to be the awesome LG G2 with a 13 MP camera :)

You can see the little nicks along the side from normal wear and tear which not makes be believe that chamfering is pretty useful in keeping the stones protected from chipping.  In fact as I finished taking the shots I realize that it is very important to chamfer the sides if only to protect the sharp and severe edges from chipping. I must be more careful when handling my stones, this comes from quickly putting them away.


I just run the stone at this angle back and forth lengthwise over the plate about 8 times. It is not necessary to press down hard. 


I think the pictures say it all, I just run the stone over the plate at a 45 deg angle at minimum pressure and it only takes  minute to do the whole stone. You'll need to repeat the process as you flatten the stones but it is easy and quick.

You can still see a couple of little nicks in my 1k stone on top but those are easily removed by just making a few more passes. 

I find the Atoma plate, the 140 and 400 to be absolutely amazing products, they excel at sharpening as well. I have the 140 in the EP sized as well but I wore it out, it lasted 2 years though and that is pretty good considering how often I used it.


Thanks for being here, I have over 11,000 folks now who have visited my Blog. Yes I suppose half of those are people who got lost on the Internet but it keeps me motivated.


Thank you Jim for suggesting this topic, I learned from it myself.

I went from thinking Chamfering the sides isn't that important to knowing now that it is, it protects both the edge of the knife and the sides of the stones.

Cool

Peter


Shun Nakiri above and a stone sculpture I saw in Scottsdale below.

Wednesday 19 November 2014

Benefits of being sharp.

Hi and thanks for being here to read my Blog Posts.

From my perspective and in own opinion, knives are either extremely sharp or they are dull, there is just a lot different levels of dullness.

As I have mentioned before, I don't know anyone else who sharpens knives but everyone   I sharpen for is interested in sharp knives and most guys mention an interest, a phase they went through. I guess I went through that phase but it never ended.

Typically, and this happens to me everyday, I meet someone with a dull knife (knives) and they range in age from 1 year to 20 years and if I am lucky they have never been sharpened after original purchase. (I say lucky because the bevels have not been screwed up by someone using a grinder)

Basically, the pattern that repeats itself is the owner of a brand new knife is thrilled with the way it cuts, the sensation that is felt by using a sharp knife and then in no time at all, within a few weeks that sensation turns to frustration and the knife spends it's life being forced through food and the owner just becomes complacent and lives with it.

IMAGINE having that same knife as sharp or sharper as new for the rest of it's life.

I'm sure anyone reading this probably knows how that feels, i.e. a sharp knife all the time. I just understand how people refuse to do anything about it. Especially professionals who use knives every single day for 8-12 hours a day.

So what are the actual benefits of having a sharp knife?

Maestro Wu Bombshell Cutlery (Chefs knife)

1. It is safer, a dull knife will easily slip off a vegetable with a tough skin, a turnip for example and you can cut yourself badly because of the force required to cut through anything.  You have cut yourself with a dull knife, it hurts like hell too and takes a long time to heal.

2. A sharp knife relieves stress believe it or not. I'm often given a knife to sharpen by a husband who has a wife that basically MADE the guy bring me the knife because she was so fed up with using it. She was stressed out every time she cooked, the husband talked her into buying an expensive knife but refused to do anything about it when it became dull in 3 weeks. Every evening, the same crappy scenario unfolded and eventually he decided TO DO HER A FAVOUR and get the stupid knife sharpened. (Also have been informed many a time that the husband could do just a good a job as I do but she insisted on getting it done professionally). I have been thanked by those same wives many a time, a sharp knife let her revisit the joy of cooking, she was trying new recipes and the stress was gone. (Well the dull knife induced stress that is....still had the husband there)

Globals love them or hate em


3.  Sharp Knives improve the flavour of food.
This is the most important one in my opinion and I did not believe it until I saw it and tasted it with my own eyes/mouth.

I have known for years that Japanese Chefs (in Japan that is, not all of them here in North America) sharpen their knives every day because they understand the value of a sharp knife. These are the chefs that are slicing up raw fish and vegetables for 12 hours a day, these are the professionals using Yanagibas and Usubas in their daily lives.

I had read that a dull knife can and will alter the flavour of certain food products because of the tearing action of the knife passing through something like an apple, or tomato or a piece of steak.
I have also seen pictures of certain delicate leafy produce actually changing colour immediately after being cut by a dull knife. 

Then I watched one of Murray Carter's sharpening videos in which he cuts two apples, one with a dull knife and of course the other with a sharp one. He left the two pieces on a plate and went to work sharpening. Within 30 minutes there was a noticeable discolouration of the apple slice cut with the dull knife and absolutely no difference in the other slice.  I cannot recall just how much time passed but it the difference in colour of the apple slices was quite obvious.

Basically,  a dull knife with it's edge folded over and broken off in pieces will saw and tear through vegetables and protein and disrupt the cells at the molecular level so cells are torn open, more than necessary of course and juices and blood spill out unnecessarily. So the food dries out faster and vegetables like a lettuce will wilt quite rapidly.  

Not to mention the ridiculous amount of force necessary by the chef to cut through those products.

A sharp knife of course will glide effortlessly through the same foods and slice on the cells the very refined edge of the edge comes in contact with.....there is no collateral damage.

I saw the is in person at a cooking class where the chef brutalised 10 granny smith apples with his dull Global Knives.....it was painful to watch. I started the timer on my cell phone and within 8 minutes the apple pieces starting turning brown.
We have all tasted meat that is dry, perhaps the culprit is not just over cooking but a dull knife.

I am sure there are other benefits, I will add some as I think of them.


Thanks for reading.

Tuesday 18 November 2014

Edge Pro what I do right and what I didn't start off doing right.

Hi,
First of all, check out this awesome Benchmade Folder in D2 Steel, it's a nice knife, not mine though.


Yes it sharp too and the reason I am putting this shot up is to show you that you can do this yourself with the EP Stones, and Tapes. However, don't get hung up on trying to get mirror edges on your blades. This is not the perfect mirror edge, if I look carefully enough I can see tiny scratches and it doesn't bother me a tiny little bit.

I used to read a lot of different things on different forums and discovered that not everything is true, not everyone who posts things is posting accurate information.  I found myself always thinking that I had to do better at everything I did because someone who may have been sharpening for 2 days and read something on a different forum posted it and I took it as gospel.

I found it best to stick to one forum and I soon got to know who I could respect and who was going to teach me things. When you get an individual who never asks questions or seems to have the perfect answer for everything I start to wonder. I hope to hell I always have questions because this sharpening journey I am on is never going to end.


Now here is a knife that I like to do on the EP due to its bird beak shape but it can be done freehand.
The EP is perfect though and if you have the 1/4 size stones, you are laughing. Like the ones in the Picture below, I have the 220, 600 and 1000.  I will be getting the newer 400 and 1k stones. Did you know that Ben sells a 1200 grit stone? You have to ask him for it though.


The biggest mistake I made was rushing out to buy different stones for the EP because of all the things I was reading. People often say that they don't like the EP stock stones and you NEED to have Shapton or Chosera or Nubatama or Natural stones to get the knives truly sharp. That is not true at all, if you can't get the knife sharp off the EP 220 and 400 then you just need a little more practice.

Now it is cool to have the different brands of stones but do not feel the need to get them, if you can't get the knife sharp off of the EP stock stones, you are not to get them sharp off of Shaptons.

Now if you bought an EP Apex with a different set of stones, like Shapton or Chosera, that is cool, they are awesome stones, my point is that you should not feel pressured into getting them.

Now the one item that I did find extremely useful as the EP sized Atoma 140 but remember, sharpen a lot of knives and I've worn it out. If you are just sharpening your own knives then what you have is likely fine.


Another problem I encountered was moving to fast with the stone arm and I found that sooner than later my stones were dishing in the middle. After watching the latest video on the EP Site by Ben Dale and his son, I noticed how much slower they were moving. Now they may have been slowing down for the sake of the tutorial but slowing down and really focusing on using the entire length of the stone really helped me.

BURR - I cannot over emphasize how essential it is to raise a burr with your first stone, you can get a knife sharp without raising a burr but there is no comparison to what your knife will be like if you are patient and work to get that burr on both sides of the knife formed.

I also thought that I had to raise a burr with every stone, that is not true either. The first burr is an indication that you have pushed the fatigued metal to the opposite side of the blade, so mission accomplished and once you do that on the other side there is no need to produce another burr because that would be formed by new metal. Now I am not saying another burr won't form, that is ok, it happens all the time but you just don't need to continue grinding with you higher grit stones until you FEEL a burr. As long as it was created on your first stone, you just need to make sure there is nothing left, no debris on the edge when you are finishing off. So very light strokes will accomplish the cleaning of the edge, and I mean light as in weight of the blade only.

One More Time 
Now what about scratching the blade, can it happen?

Heck yeah, if you are concerned about scratching the blade then tape it up with painters tape. The stone on the stone arm is not scratching it, it will be the tiny pieces of grit and metal that is resting on the blade table, the blade table that your blade is resting on.  I also make sure that I wipe that area off all the time as I sharpen. Taping the blade will solve the issue though and I always do that with customers knives unless they are already completely scratched up.


You will also see on some forums about modifications to the EP, I completely ignore them. Ben Dale invented an amazing device, I see no need to screw around with it. I am not saying that some of the modifications suggested are bad, not at all, I am saying that personally I am not interested. I could not be happier with the EP and the results I am getting.

I have often read that some folks just don't find that they are getting their knives sharp, not as sharp as they expected. I was there at times myself and in every single occasion, the problem was me, not the equipment.  I was not hitting the edge of the edge, I was not really sharpening the knife. A tiny adjustment, sometimes it was pressure, sometimes it was repainting the edge with a sharpie to help me get back on track.

Now one thing that  Ben did teach me and it is on his site is how to create a Relief Angle or just Relief. I don't think he actually calls it that but it really is establishing compound bevels.

It is easy.....here is a simple plan to follow.

For your average kitchen knife that is often too thick. ( For those Japanese Hand Made and very thin, this is not really necessary)

Let's say you have an old 8 inch Wusthof chef knife and you want to sharpen it at 19 degrees.

Instead of setting the pivot arm to 19 deg set it to 15 deg and start grinding with your most coarse stone. You are not trying to sharpen the knife and reset the bevel to 15 deg, you're going to get to that 19 deg setting soon.  You are creating a Relief Angle at 15 deg (basically 5-6 deg less than your primary angle). You can go through all your stones at this 15 deg angle and polish it to your hearts content, but remember, don't be concerned that the knife isn't getting sharp, you are not there yet. This can take awhile, 15-20 minutes approx or even more.

Now raise the angle to 19 or 20 deg and starting with a 600 EP stone, you don't have to start with a coarse stone, now you start sharpening the knife and you use very light pressure. The knife should get very sharp and it should happen very quickly.   I have done this many many times and at times, I have starting sharpening the knife (Primary edge not Relief) with a 5k stone. It will depend on how well you did with the Relief Face, how close you came to the Primary Edge.  This took me a few times to get right but it pays off, it will result in extraordinary edges and I use it often.

Ben Dale warns us about thinning the knife at an angle too acute, in other words, selecting an angle of 15 deg for example and just grinding away until you reach the edge and sharpen the knife this way. While the knife will be sharp, he says it will be difficult to sharpen in the future and I believe him.
Keep your Primary Edge up at 19 or 20 deg.

This is applicable to 90 percent of the knives I sharpen, it is not applicable to a Takeda or Moritaka or other freaking awesome Japanese knife where you can sharpen it at 12 deg in the first place.


I will be taking soon about the reasons we want a sharp knife and what a dull knife does to protein and vegetables. 

I had an Interview yesterday with the newspaper, they came to my house and watched me sharpen a knife. Tomorrow the photographers are coming. COOL eh :)

USUBA

THANKS FOR BEING HERE

Monday 17 November 2014

Edge Pro STUFF - COOL Stuff

This is just a quick entry to state that I will be spending more time talking about my experience with the Edge Pro and I will try and use pictures as much as possible to help folks understand what I am saying.

I'll talk about chamfering the edges of your stones and how I do it.

As a quick note... I do not think it is essential to do this, Ben Dale ships the stones without chamfered sides and now that I think about it I have not run into any situations at all as a result.  I don't chamfer the edges of Edge Pro Stock Stones at all, so I don't think it is something you need to fuss about.

Some of the other stones I use, Shapton Glass or Naniwa  Chosera come thicker than the stock stones and I find the edges a little sharp myself. So they often come with then chamfered and I keep them that way that way with the Atoma 140 plate.  Also, I have cut some of my own stones for the EP and those were definitely a little harsh so to speak on the sides so I did smooth those out.

I really don't think you need to worry about it too much though, I have NEVER damaged a knife edge by using a stone that was not chamfered. In fact, the only way I even considered getting the edges chamfered was because I ordered a Shapton Pro 15,000 stone from Ken Schwartz and it came that way.

I'll talk about things too as suggested by Jim and some others (thanks guys).


The picture above is a few years old now and represents a portion of my EP Stones.

I've sharpened thousands on knives on the EP Pro and have never ever run into an issue as a result of a stone that was not chamfered. Remember, it is SLOW and STEADY on the EP, take your time and you won't have any issues.

I will however show some pictures of how I do chamfer the sides of the stones but in my opinion it is not absolutely necessary.  You may read about it being recommended by others but if Ben Dale doesn't do it, there has to be a reason.

This is my opinion only based on my experiences.

More EP stuff to follow.....plenty of lessons learned.


Peter

Thursday 13 November 2014

Phoenix House of Knives........Paradise


Well I finally got to cross a must see place off of my Bucket List and this one was right near the top of the list. The Phoenix House of Knives in Phoenix AZ of course.

Before I went in, I prepared myself for some different scenarios:

1. Upon entry, and upon explaining that I sharpen knives, I get the "oh that's nice" response and I'm  asked "can I help you with anything" meaning, are you going to buy anything, if not, we really don't care that you sharpen knives back in Canada.
(Would of been ok with this because I was actually in the store) This scenario did not even come close to happening)

2. Another scenario could have been that the folks inside were not that friendly and the knives were overpriced and the fella sharpening looked like he started the job that morning.
(Would have been ok with this scenario because I was there at least but again, not even a hint of any of this stuff)

3. The Dream Scenario involved a friendly and warming welcome and a genuine interest in the fact that I was a sharpener in Canada and nothing but smiles and no pressure at all to buy anything despite the abundance of jaw dropping knives and  dream stones.


The third scenario was something I thought about very briefly so as not to be disappointed but that is exactly the scenario that played out........over and over because I went there three times. (Would have been once if not for the attitudes and professionalism of all three people I met)

In fact,  I think they treat anyone like gold who goes there, I was nothing special, I didn't deserve any special treatment just because I am knife sharpener but they made me feel like they opened the store that day just for me.


First of all this place is cool, this is paradise for a guy like me, the knives are spectacular, I absolutely loved the Murray Carter knives that they let me fondle, they are truly beautiful knives and the handles on them are superb.

For me though, the highlight of the visit to the Phoenix House of Knives was meeting Corey, the Head Sharpener and all around nice fella. Remember this is a man who shares a passion for sharpening knives and also, a passion for Japanese Water Stones. I don't meet people like Corey often, in fact never until now.

Not only did he take time out of his sharpening duties to chat but I got to see someone else who does what I do.  He is an outstanding knife sharpener too, I knew this just by watching him and talking with him so it was no surprise when I got to feel and see the edge of knife he had done......beautiful work.

It is awesome the way they do the sharpening right up front where  you can watch them sharpen knives, and they were busy, they are living my dream actually.

Of course the setting in Arizona enhances the whole thing, it is so beautiful there.


Sedona
I did not get to meet the Owner Eytan but that I do plan on returning on next visit in 2015

Corey and I at his sharpening station....(I'm the old guy).

Corey


Corey is not the only sharpener there, the other gentleman was just as friendly and he was sharpening here and there.

If you get the opportunity to visit, it is quite something, the knives are just amazing, I saw my first real Bob Kramer knife there as well.  

I purchased the Green Brick and a very cool sharpening "pond" and I can't wait to try them out later today as I catch up on all the knives that were waiting for me upon my return home.


Phoenix House of Knives.....A top notch place with some very friendly and talented people all eager to help you and talk knives and sharpening. 


Thank you for being here and thank you Corey for your time and patience with me.  

Tuesday 4 November 2014

The Steps to Sharpness

I'm heading to AZ for a week and I'll finally get to visit the Phoenix House of Knives. It is a mecca for kitchen knives of all different qualities and also a place to buy water stones so I really look forward to it.

In the meantime I will share some common mistakes, all mistakes I made when learning to sharpen and while none of them are serious just being aware may help you out. I also believe it is important to make your own mistakes and learn from them, you will, I promise


1. Higher grit stones mean sharper knives.
This is not true at all. When I first started collecting water stones I focused on the ultra fine stones, I thought my key to success was 8,000 grit and higher. The truth of the matter is that your coarse stones  and medium grit stones are the most important, they get your knives sharp, everything else refines the edge.
So concentrate on a good coarse stone, a Chosera 400, a Shapton Glass 500 or anything else in that range, there a lots and lots of great coarse stones.  You should focus on getting your knives sharp, I mean sharp enough to slice telephone book paper beautifully coming off the first stone you use.  This is the real key to sharp knife.

ENSURE you raise a burr with that first stone on both sides of blade and from the tip to the heel and you only NEED to do this with the first stone. This represents the removal of that fatigued metal and the removal of the burr exposes the fresh new steel underneath, the new cycle begins with this.

You may be starting with a 1k stone that is fine, the same applies though. When I say you only NEED to raise the burr once, it is OK if you keep raising it,  just ensure it is gone when the sharpening process is complete.

The basic setup is the way to go, coarse (220-500), medium 800-2k and fine, 3k and up.
If you have the 800 King stone for example that could be your coarse stone,  your first stone to use when starting with dull knives.

Coarse stones create scratches in the bevels, subsequent stones remove those scratches, refine and "clean" the edge, you want a nice clean edge but some "teeth" are fine. You will have to experiment with different levels of refinement to get the edge that works for you.  A 500 grit finish can be made to perform quite will in any kitchen, a 1k edge is perfect.

There is nothing wrong of course with having an 8k or 10k stone, use them and see what you think, all I am saying is that if you have not put in the time with the first stone, pulling out a 6K Arishyama is not going to change much. Now if you have a really sharp knife off that first coarse stone, then the 6k will do very nicely.

Also try jumping in grit, a 500, 1k and 5k edge is fantastic.
King 800

PATIENCE

Do not move to the second stone before the burr homework is done, that could take 15 minutes, even more, so if you need to put the knife down and take a breather do so, believe me, your patience will be rewarded and a lack of patience will result in punishment in the form of frustration and an inferior edge.


SHARPIE


Use it often, even on the same knife.....Sharpie On,  Sharpie Off. Use the painted edge to  guide you successfully along, your goal is to bring the two sides of that knife together perfectly at the Apex. (That is much easier said than done, don't worry about it too much, just strive for it, anything less doesn't mean your knife cannot be razor sharp)


FOCUS

When I sharpen freehand, I picture in my mind those two sides of the knife coming together at the Apex of the knife and making that area (the primary edge of the edge) as perfectly joined as I can and a continuous line all the way down the length of the blade. This takes a lot of practice but it helps me to picture this so I need to focus.

PRACTICE ON CHEAP KNIVES

I don't agree with this, (remember these points are based on mistakes and observations). Cheap knives, I mean crappy steel and so on are difficult to sharpen, so even though you may be doing everything right, the properties that are lacking in that steel are prolonging the process. This is breaking down  your confidence by deceiving you.
Practice on a decent knife, TAPE the blade if you want to,  the tape will protect if from any scratches that are a result of carelessness......it happens, I've been there.


MANAGE EXPECTATIONS

Lets say you get yourself a beautiful set of Naniwa Chosera Water Stones and  a good knife and after 30 minutes the knife feels no better. 

First of all,  be proud of yourself for taking the steps to sharpness and now remind yourself that it just takes time, it takes practice, 20 knives later you should see some improvements. Watch videos on YouTube, what Jon Broida's from Japanese Knife Imports, that guy is brilliant and his videos are first class. 

Don't get discouraged, the process will work, the abrasive nature of the stones will do the work. 
IF you are not able to raise a burr, remember the sharpie trick, you are doing something simple, and often times it is a tiny adjustment of your angle that does the trick.


Don't be worried about ruining your knife, you won't, unless you are driving the edge into the stone. Experiment, add or ease up on the pressure, In almost every case the use of pressure is an issue, people are using too much. 

I will be back in a week.


Thank you for being here, I will take some cool knife pictures in Arizona


Thursday 30 October 2014

Hardness


The YouTube video here really helped me understand how the process works and the key thing to realize is that in many  cases, this is an automated process.


Rockwell Hardness Test

Basically, kitchen knives vary in hardness from 54 to 67 with the most common knives, the ones most of us own such most Henckels, Wusthoff, Grohmann are in the 56-58 range. It should be noted that even one number represents a significant variance in hardness, so a knife with a hardness of 60 is much harder that a 58.

Of the knives I have sharpened, 60 seems to be the perfect number in terms of holding edges and ease of sharpening. Remember, there are other factors involved that can have an impact on the quality of knife. Just because a knife has a hardness of 60 does not necessarily mean it is better than one with 58.

Rockwell hardness testing is an indentation testing method. The indenter is either a conical diamond (brale) or a hard steel ball. Different indenter ball diameters from 1/16 to 1/2 in. are used depending on the test scale.
To start the test, the indenter is “set” into the sample at a prescribed minor load. A major load is then applied and held for a set time period. The force on the indenter is then decreased back to the minor load. The Rockwell hardness number is calculated from the depth of permanent deformation of the indenter into the sample, i.e. the difference in indenter position before and after application of the major load. The minor and major loads can be applied using dead weights or springs. The indenter position is measured using an analog dial indicator or an electronic device with digital readout


I think we have the basic idea now, metal is tested using a indentation process and for knives it is the "C" Scale so the letters HRC I believe stand for Hardness Rockwell C scale, (kitchen knives, or just knives)

I think like other things in our lives that we buy, this hardness scale is used by knife makers/sellers as hype. 

Not many people purchase their knives based on this scale, they won't not purchase a good knife just because it has an HRC of 58 and not 60. That is my opinion.

Here are some of the common knife brands and their HRC rating:

Note that a single digit increase denotes a 10% increase in hardness and therefore a  10% increase in edge retention.......but we all know that despite the level of hardness, all knives get dull sooner that we would like them too.

Global - 56-58
Shun 60-61 or 61-62 for the SG2 steels in the Shun line.
Grohmann - 54-56 (Grohmann knives are made in Nova  Scotia and very popular here)

Carbon knives, the Japanese Hand Made wonders are harder of course.

Moritaka  is up around 64-65 and Masakage knife hardness varies but definitely up there above 61.

You see a lot of knives with HRC or High Carbon Content, this means that along with the Carbon, other elements such as Vanadium, or Chromium are added but the % of carbon is higher, at least 5%.

(Axes are generally around the 40 to 45 range)

Again, there are some very hard knives that are not hand made and made of carbon, the Henckels Twin Cermax for example is a staggering 66, it's an awesome knife. 
Tojiro DP - 61. (one of my favourite knives)

Twin Cermax.....looks hard eh :)


Thanks Folks