Tuesday, 8 February 2022

The Riddle of Steel

 Hi folks, long time no see. 

I was kind of running out of things to talk about and worried that anyone reading my Blog would find it getting stale. 

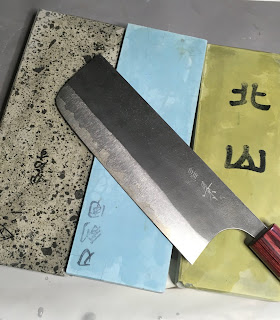
I was asked to talk about steel and how it has impacted my approach to knife sharpening, and indeed if it has had any impact at all  

Also do we need to have a knowledge of all the Alloys used to created the knives we love to sharpen  


Culinary steel reminds me of bread or wheat to be specific. Like bread, steel has changed dramatically over the last 50 years, there are so many more different types of steel now, it’s hard to keep up  back then it was basically carbon steel and when butchers used a steel hone to keep their tools sharp I believe it had more of a positive influence on edge retention because the steel was not so resistant to abrasives  


Now we basically have carbon steel and stainless steel knives. Not that long ago, stainless steel knives were considered inferior to carbon knives.  Still to this day, some of the best knives I work on are the old, 60 plus year carbon steel knives like Sabatier.  Anyone who sharpens knives know that these knives not only take a superior, startling edge but they are easier to sharpen than the mass produced, inexpensive stainless knives. I’m quite sure it’s due to the inferior quality of the steel making them resistant to abrasives due to the impurities  


Now however, stainless steel has come a long way and several varieties are quite amazing and take outstanding edges. Some of the top Blacksmiths create culinary masterpieces out of steels like VG 10, R2, SG2 and the dreaded ZDP 189. Also what some consider the best best Japanese steel, HAP 40, a powdered steel, ridiculously hard (64-68) and composed of the usual premium alloys like Carbon, Chromium, Molybdenum, Vanadium, Cobalt and Tungsten. 


As for the wonderful carbon steels we still love the Shirogami, Aogami (1 & 2) and Aogami Super.  


We can just Google call of this or check out an awesome book by the Canadian Kevin Kent who produced The Knifenerd Guide to Japanese Knives . He and Naoto have forgotten more about steel than I’ll ever know  


So how has this information, this plethora of amazing steels impacted the way I sharpen and knowing what I know now about steel, which is still limited, has it made me a better sharpener?


To be honest, we don’t need to know about all these steels and the percentages of each alloy in every steel to be able to sharpen well, in fact it really has not made much of a difference to my edges from a practical point of view. If I was a guitar player, obsessed with it, would knowing what type of wood was used, what the strings are made of make me a better guitar player.?  No, however that knowledge would be helpful in picking out the best guitar .  So knowing what these dream knives are made of will guide us towards the right knife fir us perhaps  


The only thing that influences my sharpening approach is know if the knife is hard or soft. When I pick up a hand made carbon or stainless knife ( made of the good stuff) I’ll adjust my sharpening angle accordingly, it will be more acute, around 12 deg per side and I’ll finish the knife at 5,000 grit in most cases. The quality of the steel allows me, drives me to do this to get the most out of the knife for the customer.  

Also, for the extremely hard steels like HAP 40 and ZDP 189 I’ll always grab a Shapton Glass coarse stone to form the Initial Burr  


You don’t need an in depth knowledge of steel to get all of the joy that freehand sharpening has to offer. It’s just another stage of the journey that enhances the overall process .


Thank you for sticking around  

Peter Nowlan  

( Oh, I’m on Tik Tok now doing sharpening videos  as “ @SharpenerPeter)

.


Sunday, 21 February 2021

Keeping it Simple

 Hi,

A while ago Paul from Paul’s Finest.com asked me to make a sharpening video for his YouTube channel. 

The purpose of the video is to demonstrate how simple we can make the process and how inexpensive it can be. We both noticed over the last couple of years how many folks who are interested in learning get caught up in certain aspects of the sharpening process unnecessarily.


I have received many emails asking about things that really don’t have to come into play until much later on the journey, if at all. Thinning, finishing stones, (which brand is best), edge leading or edge trailing, compounds for strops, what angle is best for certain foods. It’s a long list but the thing is, many of the people asking the questions have never even tried to actually sharpen a knife, some have never seen a whetstone. 

This is due to the overwhelming volume of material on social media combined with our primal urge to sharpen something.  So many males have shared their experiences with me, whether it was a one time event or a continued experience, we love to sharpen, it’s in our DNA. 

I feel that some folks watch a guy slicing a tomato without holding the tomato, or grape and they get fooled, they feel that this is a standard to be met, the benchmark. I see them as parlour tricks even though there was a time I felt the need to do the same thing. I’m no suggesting that these folks are not creating exceptional edges, it’s just not a goal to set when starting off  

This is why I don’t put stuff like that on my Instagram channel  as I do t think it is an accurate representation of what sharpening is about, it’s not the start of the journey it’s just a side road, optional to be explored way down the road  

Imagine the worlds finest sharpeners, can you see them slicing a tomato to prove to people that they possess skills ?

They became who they are because they focused on the fundamentals, they kept it simple. I remember seeing a friend of my fathers making a chisel exceptionally sharp on an old, unidentifiable oil stone, he was focused and skilled as a result of practice, covering the basics  

The purpose of this article is to comfort newcomers, don’t worry if the knife you’re working on isn’t popping arm hair, it’s not important.  It took me decades to get there. What’s important is that you try again, you focus on reaching the edge of the edge with every stroke, you slow down and forget about the miracles other people seem to be performing on Instagram. Start off on the right foot and you’ll be creating your own miracles. It’s a long journey filled with barriers to test your patience .


One last piece of advice:  Drop your ego, there is no room for it on this journey.


Peter


If you want to see the video just search for Paul’s Finest on YouTube.


Sunday, 13 December 2020

Testimonial

  Good morning Peter! Can I just say- wow! I heard my son and husband remarking Friday night and yesterday how amazing the knives cut now, but I just experienced them this morning. Unreal! We can’t thank you enough.  And I also would like to say that the presentation of the knives wrapped up with a note is a wonderful touch. My friend Ross may be reaching out to you. 

Sunday, 22 November 2020

I’m still here

 Hi folks 

Just a quick note to say that I’m still around and sharpening almost daily despite the shit storm. 


Regarding the photo above. I’m often asked how long it takes me to sharpen a knife. I always say “about 15 min”. I think this is normal for most sharpeners who have been at it for awhile. Naturally this is not a fixed time and especially nota time to shoot for. It’s not that important really, it’s not a race and the process should be enjoyed  


I timed myself in this one and was surprised by the timing. I used a belt sander for the repair which was about 2 minutes and the thinning after that was about 5 min. It was an easy job though. I’ve spent 90 minutes on a knife before. Several times in fact so as I said, it’s not a race. This doesn’t indicate any level of skill it’s just that I do these repairs a lot. 


I’m just saying hi. I’ll try to create new content and thank you for sticking around. 


Peter

sharpenerpeter@gmail.com

Tuesday, 7 July 2020

Pressure Tactics - Changing it uo

Hi folks,
I’m still here and still sharpening despite the shitshow going on in our world.

Some who read my Blog (Thank you so much) know that I use four levels of pressure when I sharpen. I still do but I’ve simplified things and it has resulted in an improvement to my edges. We are always improving anyway, we should be anyway and our Ego is the only thing stopping that.

     Previously I used heavy/moderate pressure, P4, starting out. This is just the pressure necessary to
raise the Burr, it can change with every knife so I don’t just go to town on the pressure I use a level that results in Burr formation, it’s usually a little heavy. Then, as I progressed to the next stone I dropped to a lighter level, I only used P4 pressure once basically.

     I did this because I thought that I’d be wasting metal if I used anything but light/moderate pressure after the initial burr formation so in my mind I was only forming the one Burr. My mind was wrong 😊

      I learned from a man who has taught me many things , Jon Broida that the amount of metal removed by additional burr formation is trivial, a drop in the ocean.  So now I use the same 4 levels of pressure on every stone but with one major difference.

   My goal is to form one Initial Burr on the first stone. Then on subsequent stones I form micro burrs. This ensures that I’m reaching my target: The Edge of the Edge. In reality I was doing this micro burr formation anyway, it’s inevitable really.

     To summarize: I manipulate pressure as necessary to reach the edge of the edge on every stone and I also continue to remove the burrs on every stone by continuing to use diminishing levels of pressure.

     The bottom line is that this has been a mindset change. I’m not  wasting metal because I’m careful with pressure. I’m striving to remove metal in a controlled manner, always. The knives are exceptionally sharp.

    Forming micro burrs has also taught me to really finesse my application of pressure.

This is easy folks, you don’t even need to be stringent on the four level thing. Two levels works, an initial and micro burr level and a lighter level to remove those burrs.


I hope I’m making sense here 😊

Thanks for reading
Peter

Tuesday, 24 March 2020

Mistakes and what I learned from them.


This is not so much just a list of mistakes I've made, some if it is just a lack of knowledge at the time. Which can be classified as a mistake in my case because I could have tried harder to learn the things that I didn't know. 

It is very important to fail at things, this is the way we learn. I know some sharpeners who have contracted the EGO VIRUS and there journeys have come to an end, the poor bastiges. I have no ego and I'm excited to learn more as the journey continues to unfold. I don't care if a fella who started sharpened 2 months ago shares something, I won't just discard it. 

(Notice I said "fella" above, I do this for a reason, I even wrote an article about it. How many times have we been sharpening in a Farmers Market scenario or somewhere else in public and men have mentioned their sharpening experience? This is a continuous event for me, mostly older folks who like all men got The Calling, the Primal Urge to sharpen something. It's in our DNA and the reason we are different from females is because they didn't experience this Calling. My sister for example never ventured into the basement to watch my father sharpen his chisels on an old oilstone but I did every single time I could)

Okay first screw up:


I failed to get a good grasp on the fundamentals, I went purely into the physical aspects of the process without fully understanding what I was even trying to do. Now when I started, there was no Youtube, no computers so I was sort of on my own but definitely didn't take any extra steps to get a better handle on freehand sharpening. 

I fixed this after decades by throwing myself into every book, video that I could and by talking to sharpeners that were more knowledgeable than I was and there were plenty of those. Jon Broida from Japanese Knife Imports and Ivan from Tosho Knife Arts were always eager to share their vast amount of knowledge and I was a great student, full of attention. 

My edges improved significantly when I was able to fully comprehend what it was I was trying to accomplish. To this day, as I sharpen,  I visualize Side A and Side B of the knife coming together at the Apex as precisely as my skills allow. So gaining just a little bit of knowledge of the fundamentals, information that eluded me for many years many years not just made my knives sharper but it made the process much more enjoyable. My confidence soared, I'd recognized a barrier (knowledge) and I overcame it to my advantage. (This is something most folks who sharpen now already know, I am just sharing my personal experience.)

My first attempt at Sourdough bread.

Screw Up #2

Along with my lack of knowledge and then gaining it came an appreciation of THE BURR. Gees I don't think they even invented the burr when I first started back in the 70s. (kidding). 

Burr Formation is an obvious ingredient to sharp knives but the importance of Burr Removal was something I didn't fully appreciate. We can all form a burr, that's the easy part but removing it is something I drove myself to get really good at for years. Not saying I have mastered it of course but again, the knowledge that it is the most important element of sharpening put me many steps closer to being a happier sharpener, happy that is with my own results.

I do this now by manipulating pressure, just using ever diminishing levels of pressure to remove the burr, it's never fully gone I suppose when looked at under a scanning electron microscope but since I don't have one of those, I can tell myself it's gone.

Now another mistake I made was believing it was wrong to form subsequent burrs after the Initial Burr. In other words, I would form the Burr on a coarse stone and that was it. I thought forming additional burrs would result in wasting metal. However the brilliant sharpening mind of Jon cleared this up for me perfectly. Now, I do form micro burrs on every stone, It is proof that I have reached the Edge of the Edge and in doing so I have not really wasted metal. Like he said, it's like taking one noodle out of a big pot of spaghetti to test for doneness. 
Besides, I was actually forming additional burrs anyway, it's somewhat inevitable so this change was more a mindset adjustment. I don't worry about it that much now but on Japanese Knives I do really form a burr on every stone and striving to create the smallest burr possible has helped me control pressure and has resulted in extremely sharp knives.

Screw UP #3
This is not really a screw up, just a lack of knowledge of something. THE LIGHT TEST. This simple check has made an incredible impact on my sharpening.  It is something that more knowledge sharpeners than me have always been doing but I just figured it out a few years ago.

When I sharpen I always start on a coarse stone so when I form the burr and then I remove it, before I move on to the 1,000 grit stone for example I always look at the edge of the knife under a good light source. I am looking for any glints of light, reflections from tiny fragments of metal still clinging to the mother ship, metal I have failed to remove on the coarse stone. This means that where ever this light appears, I have not brought Side A and Side B together completely, it is like a break in the line if that makes sense. the Primary Edge has yet to be fully re-established. So I just go back to that same coarse stone and rework the edge using moderate to very light pressure until the light vanishes. When it does and only when it does, I move to the next stone. Now this light can be tricky to spot, if you think you see it, it is there so just go back at it for a bit. 

The difference in the level of sharpness of my edges rose very significantly after I got this little trick under my belt.

Screw Up # 4


Japanese Water Stones: As my obsession with freehand sharpening developed over the last 15 years so did my desire to own the best water stones I could have. Nothing wrong with this, it is only right and I am sure we all feel the same way.
The mistake was my choice of grit. My ignorance at the time allowed me to believe that in order to achieve the sharpest knives I could ever make, I needed the finest grit stones in the world. So my collection of whetstones (Whet means sharpen by the way), started at 15, 000 and 16, 000 grit followed shortly after by the glorious Naniwa Chosera 10,000 grit. Having these meant that I would be the King of the sharpening world. This is one of the biggest mistakes I made, it didn't hurt anything but it was another indication that I only figured out several years later that I lacked understanding of the process, how sharpness was achieved.

Basically, I ignored the coarse stone range of stones, I didn't need those. WRONG. Now, I covet the coarse stone, I rarely use anything about 8,000 grit these days.  I started to rely on my Naniwa Chosera 400 heavily and in doing so, I got my first taste of a truly sharp knife. 

Now when I sharpen, I make sure the knife is as sharp as I can possibly make it on a coarse stone, anything from 120 up to and including 800 grit. I do the light test and and spend most of the sharpening time on one of these. I go through various levels of  pressure to ensure I have removed the burr. I know that some sharpeners don't sweat this on the coarse stone, they rely on a finishing stone or even a strop to remove the burr. Not me, that is not the purpose of those items, I use the stone I started with to remove the Initial burr.

So my advice, DO NOT neglect a coarse stone, and don't think you only need to use one if the edge is damaged.  All you need to do is monitor the pressure and use it accordingly. If I pick up a knife and examine the edge and find that it is dull but not that bad, I'll just dial the pressure level down and choose the coarse stone that I think will be most effective. My course of action always unfolds the same way, check the edge, choose the right coarse stone, (often 500 grit) and match my pressure level accordingly.  I form the burr, remove the burr, conduct a light check and then smile because I know that even now, just with a coarse stone that that knife is probably sharper than it has ever been. Then I just to refine the edge by going to 1k and up if I feel like it or the steel in the knife dictates a higher level of refinement.


Don't get hung up on the brands of stones but pick something that is well known and proven to be good like Naniwa, Shapton, the wondrous Gesshin line and many more. Don't pick up the $8.00 stone at the hardware store to get started. 


Screw Up # 5

Lack of appreciation of the importance of keeping my water stones flat. I fell victim to watching a certain popular sharpener tell us that flatting is not important, it wears the stone down prematurely. Now I never let my stones get too dished but I just didn't care about having a good flattener. This was about 12 years ago and now I have FLATTENING COD.  It's really simple, just keep them flat, it's important as it grooms the surface of the stones and also helps maintain consistency by holding your sharpening angle. We can't do that if the stone is dished, we fret about building muscle memory in order to improve our edges. Why jeopardize this achievement by using a dished stone.

I don't care who you are or what level of sharpener you are, you're wrong if you ignore this. Flat is in.


LAST FU#K UP

ANGLES: I used to lose sleep thinking about all the different sharpening angles I would need to master in order to sharpen all the different knives. 
I again fell prey to YouTube videos, and probably just got myself all screwed up thinking this way, in other words, I am not blaming anyone else, my mistake,

A huge part of this was thinking that Executive Chefs could tell what angle I used the same way that they could touch a steak and tell whether it was medium or medium rare. Thinking that they all possessed this skill threw me for a loop, I was doomed.

NEVER in the 10 years since I opened my business has any chef commented on angles. This is something that only sharpeners worry about and we don't have to. 

I now use three Sharpening Angles, one for dream knives, 10-15 deg per side and one for average knives, 15=20 deg per side and a micro bevel angle of about 30 deg.  

The PINKY ANGLE works just fine, stick the tip of your pinky between the surface of the stone and the spine of the knife to achieve an angle of about 16 deg. If you master holding this angle you will be in sharpening heaven. Your goal is to own the space between the spine of the knife and the surface of the stone whether it is 15 or 17 deg angle. 

No need to fret about different sharpening angles, just fret about one when learning and how to hold it, practice is the only way. 

This is all that I have for now, I doubt many have read my Blog to this point, that's fine, I just like writing about sharpening. If you have read it, thanks, I hope you picked something up or that you think to yourself " yup, I knew this already"

Respectfully
Peter Nowlan 


Monday, 3 February 2020

What is new in my sharpening world.


Hi there.
  I find it difficult to come up with new material but I still try. Perhaps someone will find this one a little interesting.

    Generally speaking, my sharpening technique has changed very little over the years but there has been a few changes that I feel have enabled me to produce better edges. There is also one change I made that has helped from an aesthetics perspective.

    In the past on occasions I noticed that the bevel on one side, the right side was sometimes a little wider than on the left side. I soon found out that this is a common issue and I even noticed it on some new Fujiwara knives. So using the dominant hand, which we have to do, can can sometimes result in very subtle differences in angles and pressure as we flip the knife and do the other side.  The way I first tackled this was to just slow down and ensure that my angles matched as closely as my skill allows it and also I paid closer attention to pressure and time spent on one side as opposed to the other. Something was off to create a differences in bevel width so it was just a matter of paying attention and duplicating what I did on both sides in terms of angle, time and pressure.

     However,  I since found another solution. I taught myself to sharpen with my left hand. I did this to solve aesthetic issues on knives with wide bevels. I also noticed it completely removed the unequal bevel width issue. 

Awesome Naniwa Strop that I got from Paul's Finest here in Canada (My favourite place to buy stones and strops)
   What I do now is to start each knife using my right and left hand, I start on the right side to raise the burr then put the knife in my left hand and raise the burr on the opposite side. Once I do this, I use my dominant hand for the remainder of the process. This simple little adjustment has completely eliminated any bevel issues. Now I don't mean that it is easy to learn to sharpen with the opposite hand, that took me about 4-5 months but not it feels pretty good and now awkward like it did in the beginning. 

  In terms of aesthetics, on wide bevel knives like a Takeda or folder the switch to both hands influences the direction of scratch patterns and results in a more uniform finish on both sides.


Over Steeling results


    The only other change I made, as mentioned before was forming burrs on each stone. However I have since adjusted that. This is what I do now.

1.     Form the Initial Burr on both sides with a coarse stone ranging from 220 to 800 grit. The condition of the edge and the steel determines my choice but it is always a coarse stone to get things started. I use 4 level of reduced pressure to remove the burr.

2.     I check the edge to make sure that there is no light, that I have removed the burr completely.

3.     Now I go to a 1, 000 grit stone in most cases, sometimes a 1,500 grit. I now just use the same 4 levels of pressure with the goal of creating a micro burr for the purpose of ensuring that I have reached the edge of the edge. I don't always feel for it, it is inevitable that it will form, the burr that is, so I just continue to sharpen on the same stone, using different, reduced levels of pressure. The knife will be quite sharp now.  Now instead of switching to a finishing stone I go back to the 1k for some additional refinement. It is just a matter of repeating the tip to heel and heel to tip process using light pressure. This really improves the edge, it's freaking sharp:)

4.   Now I strop the edge 

5. Now I finish the process on a finer stone, anything from 2k to 9k depending on the knife and then do a final stropping. 


All else remains the same. 

Thank you for sticking around.